1. Applicable line
This manual is applicable to the installation of flexible aluminium chain conveyor
2. Preparations before installation
2.1 Installation plan
2.1.1 Study the assembly drawings to prepare for installation
2.1.2 Ensure that the necessary tools can be provided
2.1.3 Ensure that all materials and components necessary for assembling the conveyor system are available, and check the parts list
2.1.4 Ensure that there is sufficient floor space to install the conveyor system
2.1.5 Check whether the ground of the installation point is flat, so that all the support feet can be normally supported on the bottom surface
2.2 Installation sequence
2.2.1 Sawing all beams to the required length in drawings
2.2.2 Link feet and structural beam
2.2.3 Install the conveyor beams and install them on the support structure
2.2.4 Install the drive and Idler unit at the end of the conveyor
2.2.5 Test a section of chain conveyor, check to make sure there are no obstacles
2.2.6 Assemble and install the chain plate on the conveyor
2.3 Preparation of installation tools
The installation tools include: chain pin insertion tool, hex wrench, hex wrench, pistol drill. Diagonal pliers

2.4Parts and materials preparation
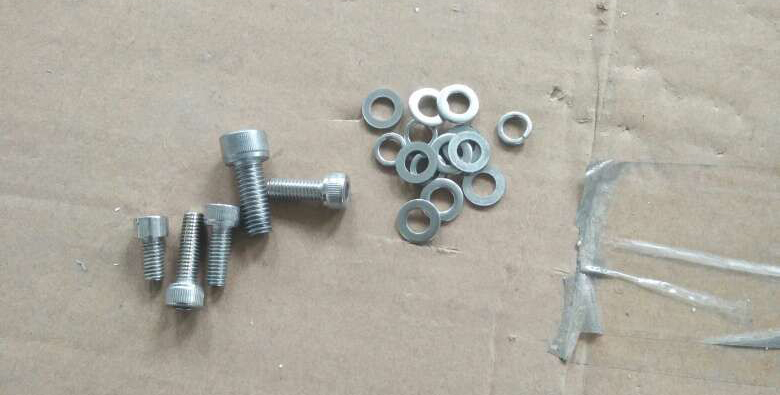
Standard fasteners
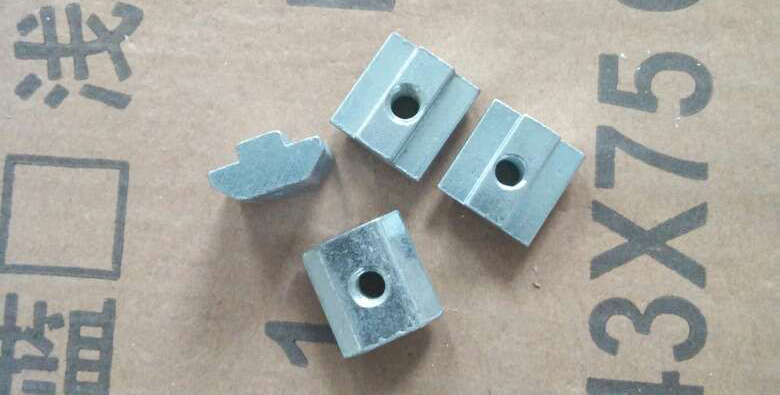
Slide nut
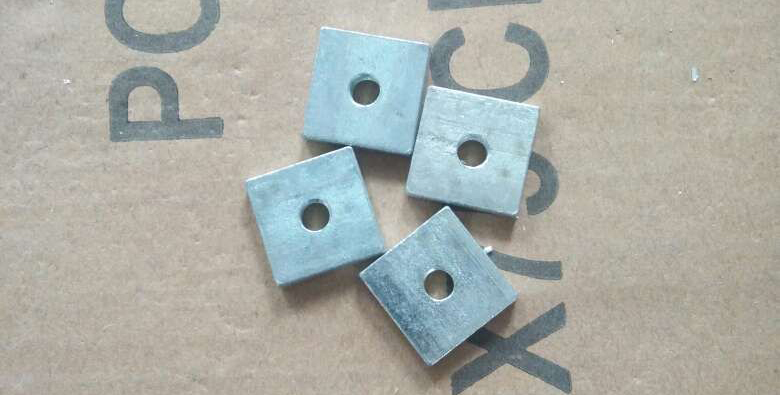
Square nut
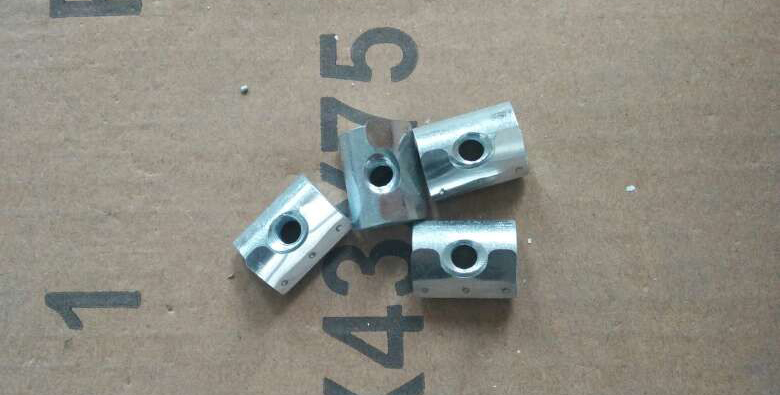
spring nut
Connecting strip
3 Assembly
3.1 components
The basic conveyor structure can be divided into the following five component groups
3.1.1 Support structure
3.1.2 Conveyor beam, straight section and bending section
3.1.3 Drive and Idler unit
3.1.4 Flexible chain
3.1.5 Other accessories
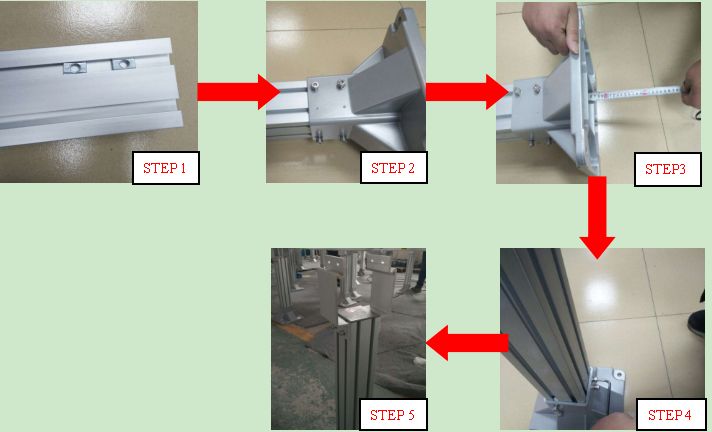
3.2 Foot mounting
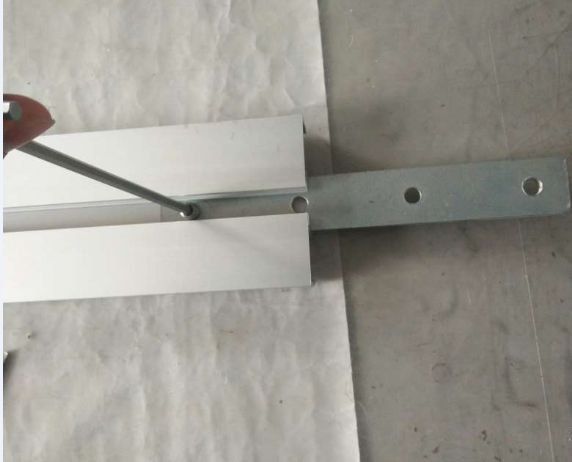
3.2.1 Put the slider nut into the T-slot of the support beam
3.2.2 Put the support beam into the foot plate, and fix the slider nut put in advance by the hexagon socket screws, and tighten it freely
3.3.1 Adjust the beam from the bottom of the foot to the size required by the drawing, which is convenient for height adjustment in future assembly
3.3.2 Use a wrench to tighten the screws
3.3.3 Install the beam support frame by installing the foot plate
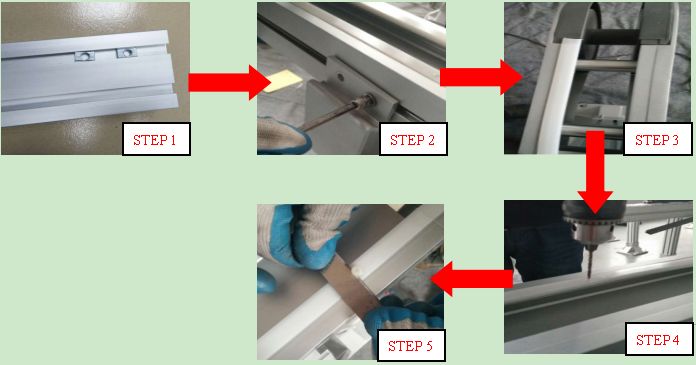
3.3 Installation of conveyor beam
3.3.4 Put the slider nut into the T-slot
3.3.5 First fix the first bracket and the conveyor beam, then pull up the second bracket and tighten it with screws
3.3.6 Starting from the Idler unit side, press the wear strip into the installation position
3.3.7 Punching and tapping on the wear strip
3.3.8 Install the plastic nut and cut off the extra part with a utility knife
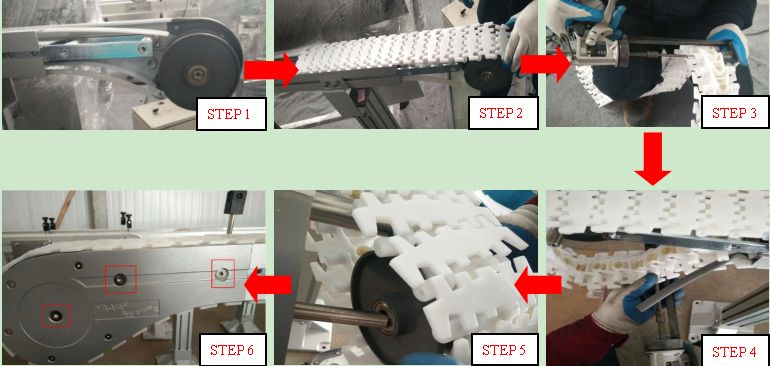
3.4 Installation and removal of chain plate
3.4.1 Start the installation of the chain plate after the equipment body assembly is completed, . First, remove the side plate on the side of the idler unit, then take a section of the chain plate, install it from the idler unit into the conveyor beam, and push the chain plate to run along the conveyor beam for a circle. Ensure that the conveyor assembly meets the requirements
3.4.2 Use the chain pin insertion tool to splice the chain plates in sequence, pay attention to the slot position of the nylon beads toward the outside, and press the steel pin into the chain plate to be centered. After the chain plate is spliced, install it into the conveyor beam from the idler unit, pay attention to the chain plate The direction of transportation
3.4.3 After the chain plate wraps around the conveyor track for a circle, tighten the head and tail of the chain plate to simulate the state of the equipment after assembly (it should not be too loose or too tight), confirm the length of the required chain plate, and remove the excess chain plate (disassemble Of nylon beads is not recommended to be used again)
3.4.4 Remove the Idler sprocket and use the chain pin insertion tool to link the chain plate end to end
3.4.5 Install the Idler sprocket and the disassembled side plate, pay attention to the wear-resistant strip on the side plate needs to be assembled in place, and there can be no lifting phenomenon
3.4.6 When the chain plate is stretched or other reasons need to be removed, the operation steps are reverse to the installation process
Post time: Dec-27-2022


